
KHKs Measure/Clear/Fill_Stacks Utility
Authors
Karl-Heinz Kunzelmann (the original source code is from Bob Dougherty)
History
Devoloped a long time ago, uploaded without further refinement or control Feb. 12th 2011.
Source
contact me
Installation
Download KHKs_Utilities.jar into a temporary folder, copy the jar file into the ImageJ > plugins directory and restart ImageJ.
Introduction
Bob Dougherty developed a very useful plugin which evaluates a series of distinct ROIs in the slices of a stack. This plugin is called Measure_Stack and can be downloaded from Bob’s website Optinav. The same website contains the detailed description what the plugin does and how it can be used.
The important part of the description is copied here:
“The ROI exists on a range of consecutive slices. The user creates the ROI on key slices. The plugin interpolates the ROI for the slices in between the key slices. Linear interpolation is used. Any slice upon which the user creates an ROI becomes a key slice. A slice can be made non-key by removing the ROI. Slices before the first slice with an ROI and after the last slice with an ROI are not included in the measurements.”
The option to select regions of interest (= ROI) of different sizes in different slices of a stack make this plugin very attractive for my own measurements. However, I was not so much interested in the measurement aspect. I was more interested to use this possibility to select, unselect, fill or clear the ROI or the complement of the ROI with my own values (i.e. foregroundcolor, background color or NaN = not a number).
To summarize in easy words: it is possible to select in a stack of image slices regions of interests which have a different shape in each slice.This is a unique feature. The user can select the shape for the regions of interest by selecting the ROI in some slices and the plugin will interpolate the shape between these slices, which Bob calls “key slices”.
I used the Bob’s source code and modified it a little so that it fitted my requirements.
Usage
In order to demonstrate how this plugin works, I will use a computed stack, which is generated with File > New > Image, 400 slices each 400 x 400 pixels filled with black in the beginning. The image is a 32-bit-image (for no specific reason, it is just that most of my microCT images are float images). In order to show you how “fill” and “clear” work I add a certain value to the stack so that you can see the results easier (Process > Math > Add: 128, all slices, then adjust brightness to a range of 0 - 255: Image > Adjust> Brightness/Contrast > Set).
You can find my plugin in Plugins > KHKs_Utilities > Measure/Fill/Clear_Stacks

The menu should be pretty much self explanatory.
In contrast to Bob’s original plugin you see additional tabs:
fillWithNan clearOutsideWithNan FillWithFgColor ClearOutsideWithFgColor FillWithBgColor and ClearOutsideWithBgColor What do they do and what do they mean?
Fill always means that the selected region of interest is filled with anything.
Clear always means that the area OUTSIDE the selected region of interest is filled with anything. The area outside the selected region of interest is the“complement” of the ROI.
Three different “fill” patterns are available:
NaN (= not a number = Nan) Foreground color (= FgColor) Background color (= BgColor) The meaning of foreground and background color can be easily explained: those are the colors which are used in Edit > Options > Colors as Foreground and Background Color of ImageJ.
NaN is used in programming and has the meaning “not a number”. In the context of ImageJ I decided to assign all pixels which should not be included in statistical evaluations the value NaN. This means that all pixels which have the value NaN will be ignored in all statistical evaluations. While this may not be a very sofisticated programming style, it saved me a lot of thinking and it is used in other routines of ImageJ in a similar context.
Therefore, let us assume you want to calculate the average grey value inside the regions of interest only, then you would assign the value NaN to the complement of the ROI (= clearOutsideWithNan).
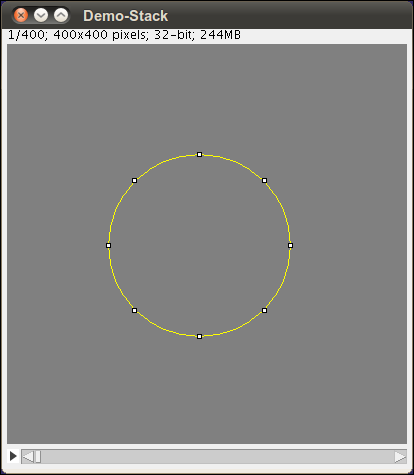
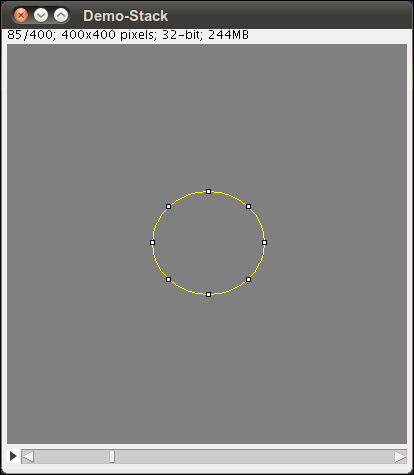
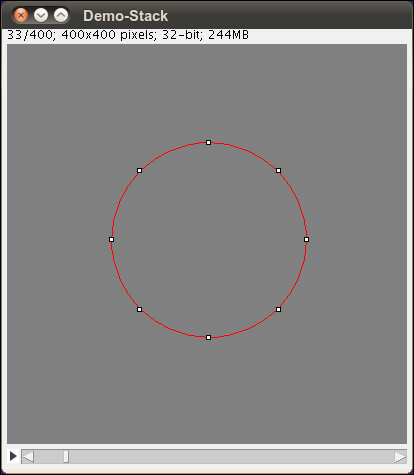
The most important part of the plugin is the selection of the region of interest. It is rather easy, too. Just select in some slices a ROI and the plugin will interpolate the shape between your selections. Your ROIs will appear in yellow (or the color you selected in Edit > Options > Colors), the interpolated ROIs will be shown in red.
As an example what you can do, I used the button “FillWithBgColor” and afterwards, with the same ROIs, I used the button “ClearOutsideWithFgColor”.
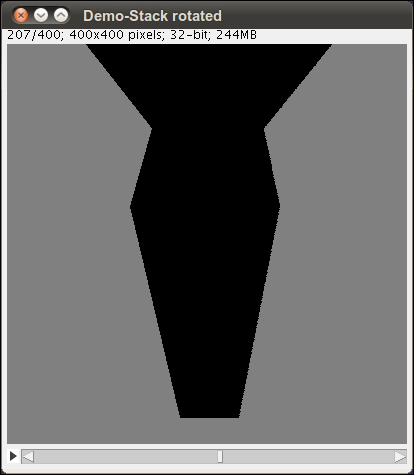
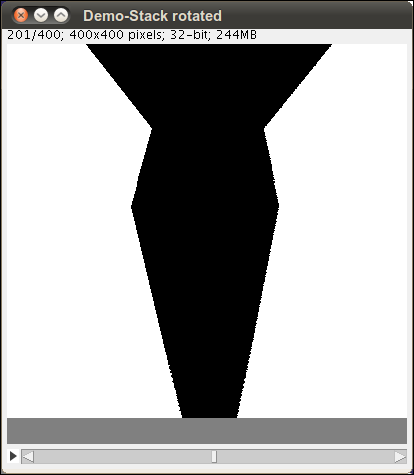
Bob’s interpolation algorithm is so nice that it works with any shape ofROI. You can use rectangles, polygones or elipsae.
Add-ons
Please check the other utilities, too:
- Set Zero to NaN
- Set NaN to Zero
- ClearNaNOutside_
- FillNaN_
The name should be pretty much self-explanatory. The two commands, ClearNaNOutside_ and FillNaN_ need a ROI of any shape, which will be the same size in all slices of the stack. The two other plugins, Set Zero to NaN and SetNaN to Zero, are needed when you convert float images (= 32-bit-images) to 8-bit-images or when you convert 8-bit-images to 32-bit-images for further evaluation.